Tuesday, October 26, 2010

Vegetarian Meatloaf (really good! really!)


I've had great results with this recipe. Even meat eaters and kids that I have made this for have inhaled it. I like to serve it with gravy, mashed potatoes, and peas. It's also great with my thyme yorkshire puddings. I also think that it would be a perfect protein dish for thanksgiving if you are expecting vegetarians.

Vegetarian Meatloaf
          2 cups water
          1 tsp salt
          1 cup brown lentils (wash and check for small rocks)
          1 medium onion, diced
          1 cup quick-cooking oats
          3/4 cup grated cheese (use a flavorful cheese)
          1 egg, beaten
          4 1/2 oz tomato sauce or spagetti sauce
          1 tsp garlic powder
          1 tsp dried basil
          1 tbs dried parsley
          1/2 tsp seasoning salt
          1/2 tsp black pepper

Bring salted water to a boil. Add lentils and simmer, covered for 25-30 min (until lentils have absorbed most of the water). 
Remove from pan, drain, and mash lentils in a mixing bowl. Set aside and let lentils cool a bit. 
Stir in onions, oats, and cheese until well mixed.
Add egg, tomato sauce, and the remaining seasonings and mix well.
Spoon into a well greased loaf pan.
Smooth with back of spoon.
Bake at 350*F for 30 - 45 min or until top of loaf is firm, dry, and golden brown.
Cool in pan, on rack for 10 min.
recipe source:  http://www.food.com


Not only is this recipe a fabulous comfort food, it's also extremely nutritious. Lentils are made up fo 25% protein. They are cholesterol free, virtually fat free, and low in calories. Lentils are high in folate, iron (perfect if you do have a bun in the oven) and high in fiber.

Saturday, August 28, 2010

cloth diapers, the care and keeping of

Hi friends from Pinterest! Thanks for stopping by. I stopped writing on this blog once I had my twins. Feel free to come visit me over on my new blog That Crunchy Twin Mom and learn all of my teething & diaper rash secrets and more.

I decided to write this post because it took me over a year to get my cloth diapering system down. Mostly because I didn't know anyone nearby that actually cloth diapered. Yes, there are a lot of posts on the internet about it but for me it really took being around other cloth diapering mamas and seeing what they were doing. So this is my attempt to "show" you how I do it in hopes of helping someone else like me out there.....

As you may be able to tell I use the Bum Genius all in one style diapers. (These are great because they will grow with your child.) There are a lot of blogs out there that tell you the differences between diapers and help you decide which ones are best for you. My decision was easy. I had received quite a few Target Gift Cards from baby showers. You can buy Bum Genius Diapers through the Target website. I waited around until they shipped for free (Target's always having a promotion for something to ship for free) and I placed my order through ebates. I actually made money off of these diapers.


The first thing that you are going to need is a diaper sprayer. I went a whole year without a diaper sprayer. Trust me. You need one. So clean off your soiled diapers. I use a towel to transport them from the bathroom to the laundry room where I keep my diaper pail. I have a friend that keeps hers in their kid's bathroom closet. Some people use wet bags. Do what works for you.

(the first one was $12 at Target and the second one is from Ikea...sorry I don't remember how much)

You are definitely going to need is a diaper pail. Any small trash can with a lid will do. (I recommend not using a diaper genie.) You have two options. You can simply toss your soiled diapers into the empty can or you can fill your can about half way with water and 1 cup of vinegar.  The first option works fine if you was the diapers every other day. If you want a little leeway I recommend using the water and vinegar method as it will keep your diapers from mildewing and stinking up the whole house as quickly.

 When it's time to do laundry I dump the entire contents of my diaper pail into the washing machine. Then I use the spin cycle to get rid of the vinegar water that the diapers have been sitting in. I then run the machine on cold (if you use hot or warm it's smelly) with a cup of vinegar to neutralize the smell and to thoroughly rinse the diapers. Then I do the real wash in hot hot water. We use our own home made laundry detergent. It helps save even more money and keeps more chemicals away from out little one's bum... which is part of the reason I wanted to cloth diaper in the first place. (pampers chemical burns anyone?)

I do not use fabric softener. I do not use bleach*. I do not use stain remover.

I have read that all of those things can break down the waterproof lining. And well frankly cloth diapers are not cheap and being peed or pooped on is not fun. Enough said.

Then I take my fresh clean diapers and hang them outside on the clothes line. This has two purposes.
#1) The sun will bleach any stains you may have out of the diapers. Shockingly enough the insides of my diapers still look perfectly white and brand new. All it takes is hanging them outside.

#2) Washing machines take a huge toll on cloth diapers. Want them to wear out fast so you have a good excuse to go back to disposables? Just wash them in your dryer. Now obviously you will have to do this on occasion. If it's below freezing outside or has been raining for days. Every now and then is fine. And my sister in law has discovered that it can help to reactivate the velcro if its starting to not want to stick.


When they are dry and clean I re-stuff all of my diapers with the liners and put them in a basket. That way they are ready to go.

Notes

* About the bleach comment I made earlier. As soon as I wrote that I went and checked on my diapers that were in the wash. I had washed them twice and the inserts still weren't smelling fresh. The liners were fine so I did "strip" (by washing them again with 1/4C bleach.... (the inserts, not the liners).

* I know that a lot of people use cloth for night time and for outings. We don't. We chose to use disposables for sleeping because they are much more absorbent and are better at wicking the moisture away from the little one's skin. And for going out just because i didn't want to haul dirty diapers around with me. And sometimes when I don't feel like doing laundry today I'll throw them on her too.

* Because cloth diapers aren't going to wick the moisture away as well as disposables you are going to have to change them more often. Also because of that they are fabulous for potty training. My daughter even takes off her cloth diapers after she pees and puts them into the diaper pail.

* Another great thing about cloth for us is that the Little One has only had one real diaper rash. Of course it was when we were out of town, using disposables, and had left the diaper cream at home. She has gotten a little red down there a few times but we were always able to catch it before it turned into anything bad. I think that using cloth has really helped in that area. (Technically you are not supposed to use diaper cream with cloth diapers.)

* Because cloth diapers are a bit bulky the Little One pretty much lives in dresses (especially so during the summer). It makes it much easier to change and she doesn't look like she has a huge butt in them.


 If you have any questions about cloth diapering please feel free to leave them and I will answer them to the best of my ability.


If you cloth diaper and have any comments, helpful hints, or suggestions please leave them here.


And if you have blogged about cloth diapering please leave/ email me a link! I would love to have as much information on here as possible.

Thanks!

Thursday, June 17, 2010

Garlic Broccoli (& friends)


I don't know about you but my favorite thing to get at a Chinese restaurant is Garlic Broccoli. It's my favorite way to eat broccoli and it makes me crave it. I decided that I had to find a way to make it at home. This recipe is not only quick and easy, but tastes like it's fresh out of the take out carton of your favorite Chinese restaurant. YUM!

Garlic Broccoli
is ready in 30 min!
serves 4

3 medium heads of broccoli, washed and chopped
1 head of garlic, minced
2 cups vegetable stock
1/4 cup soy sauce
1 tsp powdered ginger
1 tsp red pepper flakes
1/4 cup sweetener (i use unbleached sugar)
2 tbs corn starch
2 cups of cooked white rice to serve with broccoli

Bring the vegetable stock to a boil and add the garlic, soy sauce, ginger, red pepper, and sweetener. Dissolve the cornstarch in 4 tbs of cold water.
Cook the broccoli over high heat, in a large skillet or wok. After 2 min add the garlic sauce and continue cooking for 7-10 min. Add the cornstarch mixture, stir to distribute, and cook for 1 -2 more min until it thickens.
Serve immediately over your already cooked rice.

Reccomendations:
* Use the broccoli stalk! Simply peel it (this makes it nice and tender) and slice it thinly. Try it at least once! It will change the way you eat broccoli.
* You don't have to use all broccoli. I also used carrots, bamboo shoots, and water chestnuts. I would love to use tofu in this dish. or snow peas. The combinations you can use are endless. Just make sure that you use approx the amount that 3 heads of broccoli would be. Maybe a little less because you want to have lots of sauce.
*If you use honey for your sweetener just remember that it's sweeter per volume than sugar. So go easy.
*Also you can omit the ginger and red pepper flakes if you want. Be especially careful with the ginger though. I used a "fresher" ginger one of the times I made this and it was so strong. I called it ginger broccoli that night. All I'm sayin' is...be careful with the ginger. It can easily over power this dish.


And then you can feel good about feeding it to your little ones because broccoli is full of iron, fiber, potassium, and has a ton of vitamin C, and a ton of Calcium. My little one loves this dish.

Thursday, May 20, 2010

you capture: depth of field

This past week I had the pleasure of taking photos of my sister-in law B and her friends before going to prom. They thought I was a little crazy taking photos of things with them in the background.

B and her mask....it was a masquerade prom


and B's bff and her date with her beautiful corsage.


And I feel a little crazy because I started a page on facebook just for my photography. Are regular people like me allowed to just start up little photography businesses because we feel like it? I don't know, but the voice in my head is telling me to be bold. If you want to see the sham that is my photography "business" (even though no one pays me) there is a link on the left hand side of my blog. And the rest of the prom pics are there too. I would love any feedback you guys can give me. I'm all for constructive criticism as long as it's tactful. :-) ooh and i like compliments too.

Wednesday, April 28, 2010

you capture: spring


This week we took the Little One to the Japanese Spring Festival at the local botanic gardens. I thought it was a perfect opportunity to take some photos for the You Capture challenge this week. I meant to include some photos of the Little One herself but the internet that I mooch from my sister in law (thank you April!) is being super slow.


As you can tell I've been playing around with my little photography logo and name. I figure that I can do that since I'm not a professional and have no clue what I'm doing anyway. Just don't tell anyone that.

Photobucket


Be sure to check out everyone else's Spring pictures out by visiting I Should Be Folding Laundry 

Tuesday, April 27, 2010

Traditional British Pudding

The April 2010 Daring Bakers’ challenge was hosted by Esther of The Lilac Kitchen. She challenged everyone to make a traditional British pudding using, if possible, a very traditional British ingredient: suet. I did not use suet as it is an animal product. I used a steamed chocolate pudding recipe from www.puddingclub.com. I made four baby puddings instead of one larger one. They weren't great plain but they were pretty great topped with some french vanilla ice cream and some chocolate sauce. The strawberries didn't hurt either. here is the converted recipe:

Steamed Chocolate Pudding

1/2 C Butter
1/2 C Castor (Powdered)Sugar
1/2 Self Rising Flour
2 Tbs Cocoa
2 Eggs
1/4 C Chocolate Chips

Cream the butter & sugar together until light and fluffy. Sift the flour and sugar together and add a little at a time along with the egg. Stir in half the chocolate chips. Place the remaining chocolate chips on the base of your greased (1.1 litre) pudding bowl. Add the dough. Steam for 1 1/2 hours. Turn out and serve with chocolate sauce, custard, or extra thick (whatever that is!).

See steaming method below...


Here are my ramekins wrapped in aluminum foil and secured with rubber bands. I steamed them in a large pot with a steamer basket but you could easily use a crock pot. I used tongs to remove them when they were done as they were very hot. I cooked them for the full hour and a half even though they were smaller.


Thursday, April 8, 2010

you capture: comfort

This week's challenge was ...well challenging. My daughter is my favorite subject (as you can probably tell) so I decided to go with something (other than myself) that she finds comfort in. Her kitty.


Hope that you all are having a great week!


Photobucket

Thursday, April 1, 2010

you capture: feet

 I don't know if you have noticed, but as much as I love baking...I actually have come to love photography more. I came across this "group" I suppose you could say. It's called You Capture and they give out photography assignments every week. I don't know if there is such thing as a "cooking & photography blog" but there is now. Like the Nester says... this is my blog and I can mess it up anyway I want to. So without further ado i present to you my first assignment...feet


For a long time there were only your footprints and laughter in our dreams and even from such small things, we knew we could not wait to love you forever.
 

Photobucket

Saturday, February 27, 2010

Tiramisu Cupcakes

The February 2010 Daring Bakers’ challenge was hosted by Aparna of My Diverse Kitchen and Deeba of Passionate About Baking. They chose Tiramisu as the challenge for the month. Their challenge recipe is based on recipes from The Washington Post, Cordon Bleu at Home and Baking Obsession.
It was mandatory to make the marscapone, savoiardi (lady finger) biscuits, zabaglione, and pastry cream using their given recipes. I hate to tell you but I failed.

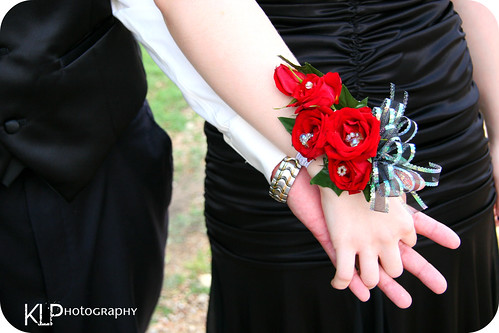
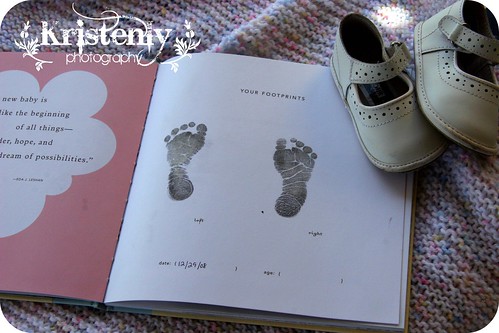
First of all this has been a busy month. My best friend (we have been friends since 3rd grade) had her first baby and I had to be there. Traveling was required which ment that I definitely did not have the 2-3 days required to complete this challenge. But time was not my only adversary. Secondly I did not have the funds available to even somewhat follow this recipe (or even the one i did make for that matter). 

I really look forward to our monthly challenges... as a full time mom it gives me something to do for me. And so I decided to make something inspired by this month's challenge. It doesn't count but it makes me happy.


Tiramisu Cupcakes

this makes 18 cupcakes

1 (18 1/4oz) package yellow cake mix (i know. i used a cake mix. hate me if you want.)
3 eggs
1/3 cup oil
water or strong coffee

Make cupcakes according to directions except replace water with strong brewed coffee or espresso if you wish. Bake and cool. Prick cupcakes with a fork or toothpick. The more holes the more coffee they will soak up in the next step. But don't go too overboard.

1/3 cup strong coffee or espresso
1/4 cup sugar

Mix these until the sugar dissolves and let cool. Brush over cooled cupcakes a little at a time until the cakes soak up all of the liquid.

1 cup heavy cream (or 8 oz cool whip)
5 oz mascarpone (or substitute*)
1/2 cup confectioner's sugar (icing sugar)
3 tbs marsala wine or coffee liquor (optional)

Whip heavy cream. Combine mascarpone and sugar. Fold in to whipped cream. Add alcohol if desired... if you choose not to you may want to add some milk depending on the consistency of your filling / topping.

Now use your piping bag to fill the cupcakes. (Push tip of piping bag into center of cupcake. Squeeze icing into cupcake until the top of the cake cracks a bit or overflows with a bit of filling.)
Top cupcakes with left over filling. (If it's too thin you can add some cream cheese and icing sugar.)

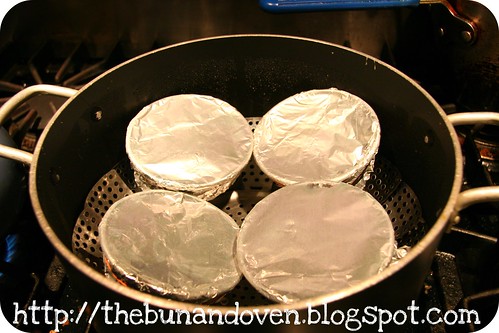
This is the kind of cupcake that you will need to eat with a fork. You will also want to use a foil or silicone cupcake liner as a paper one will get soggy and fall apart.
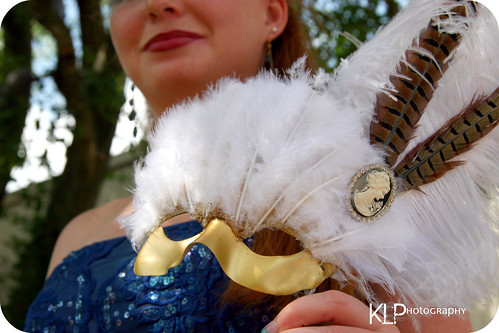
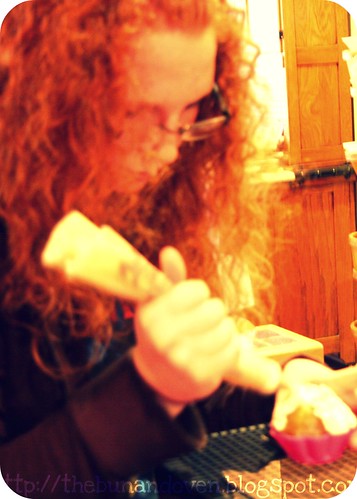
This is my very talented and beautiful sister in law B helping develop this recipe and using her mad piping skills  to make these cupcakes look like hydrangea blooms.

Faux Mascarpone 
(for cheapskates and posers)

8 oz cream cheese
1/4 cup whipping cream (i had to use half & half because it's all i had.)
2 1/2 tbs sour cream

combine all ingredients and mix well until smooth.


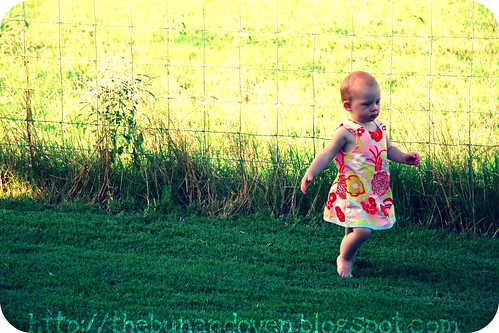
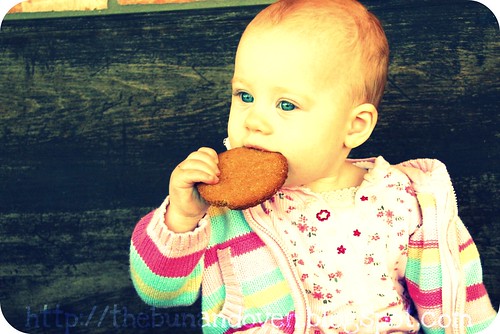
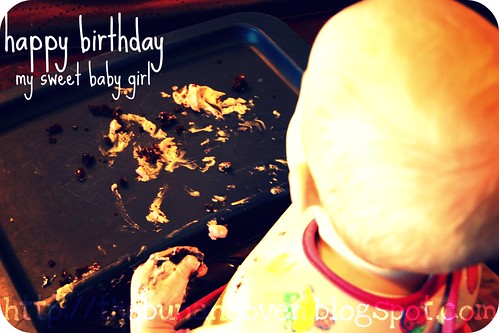
and then last but not least here is the beautiful little one. she really started walking all the time this month and is so busy. she wants to be outside 24/7. whew. it's been a busy month and i am exhausted. hope that all of you are doing well.

To check out some real daring bakers challenges just follow the link.


p.s. does anyone know if we are only allowed to miss 2 challenges a year or if it's 2 unexcused challenges?

Sunday, February 14, 2010

Chocolate Covered Strawberry (Cake Balls)

cake balls
Have you tried Bakerella's Cake Balls yet?
(they are pretty great although i think they could use a better name)
I did on accident.
I made a strawberry cake from scratch for my sister-in law's birthday and when it didn't rise like I wanted it to I just couldn't bear to throw it out. So i made cake balls. Pretty perfect for Valentine's Day if I do say so myself.

Follow the link above for the recipe.

vday


Wednesday, January 27, 2010

Nanaimo Bars Eh?


The January 2010 Daring Bakers’ challenge was hosted by Lauren of Celiac Teen. Lauren chose Gluten-Free Graham Wafers and Nanaimo Bars as the challenge for the month. The sources she based her recipe on are 101 Cookbooks and www.nanaimo.ca.


Okay so I would have loved to make this gluten free but at this season of my life i have to use what i have on hand or i don't get to make the challenge at all. First off were the graham crackers...
graham crackers

They were pretty great. I really enjoyed being able to share one of these challenges with the Little One. I think that she enjoyed it too.

the bun

And the finished Nanaimo Bars turned out great. They were super rich so I cut them into pretty tiny squares (they look big in the picture but they are on an espresso demitasse saucer.)  and used some sprinkles to add some color. I considered different flavor combinations but since I had never had Nanaimo Bars before I wanted to try the traditional recipe. Which by the way (surprisingly enough) is a super easy no-bake recipe. So we will for sure be making these again.

nanaimo bars
Thanks for a great challenge Lauren! All of us enjoyed it!


p.s. anyone have any suggestions for more traditional canadian foods?

Sunday, January 10, 2010

happy birthday little one! (chocolate zucchini cake)

zuke cake 4 real

At the end of last year we celebrated the Little One's very first birthday (a.k.a. the marker of the fastest year of my life). I try really hard not to feed her a lot of sugar or highly processed foods. I didn't want her to miss out on cake for her birthday so I made her a zucchini cake to ease my conscious.  All of my inlaws though I was a weirdo until they tasted it. That's because the only difference between a chocolate cake and a chocolate zucchini cake is that the zucchini one (other than adding a bit of vitamin a, vitamin c, calcium, magnesium, and potassium) is that it is incredibly moist. I may never make a regular chocolate cake again!

I came across this recipe watching Sandra Lee. (I've tweaked it a tiny bit.) I know that she can be quite despised in the food world but let's be real. I have a 1 year old, Christmas, and a million in laws going on. Besides this recipe tastes like it's from scratch. That's really what matters right? Right!  So here we go...

Chocolate (Zucchini) Cake


2 cups of finely grated zucchini
1 (1-pound and 2.25-ounce) package chocolate fudge cake mix (I used Duncan Hines Dark Chocolate Fudge)
2 teaspoons ground cinnamon (this is totally optional. I used it because my little one loves flavor.)
2 large eggs
3/4 cup plain nonfat yogurt
3/4 cup applesauce


Preheat oven to 350 degrees F. Spray two 9" pans with baking spray (or use parchment... do whatever you usually do)
You are going to want to drain all of the extra moisture out of your zucchini. So get a mesh strainer and smush your zucchini in there. If you don't you will end up with chocolate soup instead of cake.
In a mixing bowl combine everything but the zucchini. Beat for 2 minutes on a low speed. Fold in the drained grated zucchini and pour your batter into the prepared cake pans.
Bake for 45 to 50 minutes or until a toothpick inserted into the center of the cake comes out clean. Be sure to cool your cakes completely preferably on a wire cooling rack.

Now Sandra Lee makes a sort of tofu mousse that she serves with this and that is all well and good but 1) I wanted a nicely iced cake for LO's bday (which actually only happened because my sister in law decorated it for me...thanks mandy!) and 2) I have a "secret family recipe" up my sleeve.


cake

I will never forget my first Thanksgiving with my inlaws. My mother in law actually pulled out the wheat to grind to make the rolls. I believe that it was at that exact moment that I secretly vowed to
a) Never cook in front of my mother in law
and
b) to learn everything i could from the woman
This is her recipe and with it comes a promise that it will change the way you ice your cakes from now on.  It's called Light Frosting because it's more the like whipped cream than that stuff you buy in a tub. Make it properly (a task in itself) and it will come of smooth and fluffy with no crunchy sugar. People who do not like icing will like it and  you will get compliments like " I love how your icing isn't just full of sugar".  But beware you must follow this recipe to the T.
Light Frosting


1 stick unsalted butter (do not attempt margarine. just trust me on this one.)
1/2 cup shortening
1 cup sugar
3 Tbsp flour
2/3 cup milk (must be at room temperature!)
1 tsp vanilla
Pull out your stand mixer....because honey you're going to need it. Cream together the butter, shortening, and sugar. Continue beating and add flour one tbsp at a time. Extremely slowly dribble the milk into the mixture. If you do this correctly then it will take a while. Add the vanilla. And continue mixing for 5 minutes until there is no crunchy sugar left.

I doubled the icing recipe so that i could fill it really nicely but you don't have to. One batch will be fine for cupcakes or it you don't want to use a lot. Then use it to frost your cooled zucchini cake.

Emmer's Birthday 148


DIY Day @ ASPTL
be sure to check out a soft place to land for some great diy projects!