Sunday, August 7, 2011

falling off the face of the earth (a birth story)

It's been a long time since I've visited "blog land". You may know that since I wrote last I birthed twin boys. Tiny babies have a way of taking over your world but nothing compares to tiny twin babies taking over your world. It's a mess but it's beautiful. And then there is the Little One. Who is no longer the Little One but the Big One. I guess she will go by E now. Luckily she is in love with her brothers...ahem "brudders". She doesn't seem to think that they can get too many kisses or hugs from her. Anyway I thought I would share my adventurous birth story. My husband wrote it and I am editing out places & names. Just to be safe. So here it is... 

if you do not want to read a story about childbirth then please stop here

The Birth of Two


“Dada, wake up.”  “Dada, Buzz Lightyear.” “Dada, hug you.”  That’s pretty much my daily wake-up call. This morning was no different, except that shortly after E came in Kristen said, “Hon I just talked to Emily they think I am starting labor and we need to go in and try and stop it…”


…and that was how my morning started.


In August, Kristen had been feeling “off” and we thought she might be pregnant, 6 pregnancy tests later we found out we were right. It was exciting our second child was on the way. It was exciting but scary. I had just finished working for the Census Bureau and was now for all intents and purposes, out of work, I had also just enrolled at Some College to get my EMT certification, and so money was tight.  So began the chaotic task of enrolling Kristen for health care and the search for a midwife.


When we had E the search for a midwife had been easy because our criteria had been she had to work out of a birthing center, and in the Some Town area this narrowed it down to one choice.  This time we had a plethora of choices. We found at least 8 Birth centers in our general area, many of them with more than one Midwife.  Our Financial situation eventually narrowed it down to three, and we began interviewing.  We eventually settled on one in Another Town in Another State, which was about 50 minutes away from us.


And so began our pregnancy routine, once a month to Another Town. Everything seemed to be going fine. Kristen measured right, weighed right, and felt right. The baby’s heart beat was very good.  Kristen began to feel it moving much earlier than she had with E but figured it was because she knew what to look for this time.  Our first Sonogram was scheduled for December 2nd about 19 weeks into Kristen’s term.  We arrived excited knowing the we might be about to find out if we were going to have another little girl, or our first boy.  Kristen got on the bed, I moved to be able to see the screen, and the sonographer, got all his stuff ready.  He put the gel on Kristen’s belly and started the sonogram…


...Something was Very wrong!  I had seen a sonogram before a time or two; I had a general idea of what it should look like on the screen.  I was looking at two circles, unconnected, and side by side.  “That is not what a baby looks like.” I thought. “It’s almost like those are two heads.” I continued to silently think to myself.  The Sonographer looked at my wife and said “Are you in a good mood?” And then I KNEW!  It was not a baby it was babies.  We were having twins.


I had always thought twins came from the female, meaning if the female has twins in her family it is possible for her to have twins.  My dad is a twin, but all that means is I can pass on the twin gene to my daughters, Kristen had no twins in here family… Or so we thought. Turns out we were wrong.  Needless to say that day we spent most of our time in shock, the car ride home was one of our quietest rides ever.  The Mid-wife had told us we couldn’t deliver twins at her center as she was not authorized for that.  We felt our birth-plan was shot.


After the shock wore off the excitement began to build. We picked names the one on the left and in position to be born first was to be named D T, and the one on the right, F O. D Means Full of Goodness or Man of Prayer.  F means Fair Warrior or Small Brave One.  Their Middle names we took from Family. O means Peace. T was a different matter we like the name, but didn’t really like the meaning, all the name books say T simply means twin, accurate but kind of boring, so I did a small hermeneutical study on the word Thomas (oh well you might as well know his middle name..this would be too hard to edit) in the bible. I knew Thomas was a Hebrew name and so I began looking at the Hebrew root words it came from, there seem to be two that it could be, most scholars assume it is the Hebrew word for twin as the only time we see the name is for the Apostle Thomas who was a twin; but looking into Hebrew names that didn’t make since to me. Most Hebrew names seem to be associated with an action or inheritance of some sort, not simply with a state of being.  They didn’t name their babies’ the word for sleep simply because they slept.  So I looked at the other word and found it meant Honesty, Integrity and innocence. This seemed to fit much better, both with what I knew of names and what I saw in the character of the Thomas of the Bible. All that to say Thomas means Honesty, integrity, and innocence.


We found a midwife, Molly, that would deliver twins, and so we went and interviewed her.  There was an immediate connection, and everything felt right.  She did not take Medicaid, but she did give a substantial discount to those who were on it, even more so if we would use her daughter Emily.  We decided to use Emily. Kristen felt at home at their center, it was just a comfortable place to be.  They were brilliant in their care of Kristen. Everything was going great, they had told Kristen to increase her protein intake and we had.  Our first sonogram had shown that the boys where just a little bit small, by the time our second sonogram occurred under the care of Emily and Molly, they were exactly on target.


At 31 weeks Kristen’s body began getting ready for Labor, she was slightly dilated and had lost some mucus, she was told to stay off her feet whenever she could and do no more than small walks. By 32 everything seemed back to normal other than the fact Fin was now inline to come first.  33 weeks was the same.  At 34 weeks she started losing more mucus in very small amount. Then March 21st came.


The night before we had been going through the boy’s clothes setting aside the ones we wanted to bring to the birthing center with us, and talking about everything we wanted to have packed ahead of time, just so we would be ready in the coming weeks.  When I woke up the next morning everything changed.  E woke me like she usually does, but Kristen was already up. Kristen told me we needed to go and so we gathered everything up. Dropped E off with dad and headed out with every intention of being home that afternoon.  We did bring some clothes, the boys clothes, and other stuff, ”Just in case”, but neither of us thought we would really need it.  Kristen’s contractions began getting pretty regular in the car on the way to the Center. When we got there Emily and Molly took her and checked her out, she was dilated 5.5 cm, they were pretty sure they weren’t going to be able to stop her labor at the center.  They were able to slow it and check the position of the first baby, F; he was in a frank breech position, meaning he was butt first.  They thought it best we go to the Hospital, but only due to the fact that boys born before 36 weeks often have lung development issues. We left for the Hospital to go to the Doctor they had recommended, Dr. Cummings.


Kristen’s Contractions began to get longer, and I began to drive faster, I half hoped a cop would pull me over and then escort us around all the slow trucks.  By the time we got to a certain interstate I was pretty sure we weren’t going to stop this labor, when we passed the Speedway, where NASCAR races I remember thing they might hire me if they saw me driving now. We made it safe and sound to the Hospital about 2:00pm. Kristen was admitted, and I had to fill out all the admission paperwork, running from Kristen’s bed to the front desk and back.


Both Emily and Molly had come with us to the hospital and they were a tremendous help to Kristen and I. Doctor Cummings got there and said that they were indeed coming today and it was time to go to the OR.  We were in the OR as a precaution due to their age. (Actually they only deliver twin babies in the OR just in case.) Kristen was outstanding and at 3:02 she vaginally delivered without any drugs a breeched little boy.  F Cried almost immediately and I cut the cord, however I was suddenly torn my boy was with strangers crying, and my wife was still in labor.  At her last pregnancy we had both held E within seconds after she was born. This time I could see him, but hadn’t even touched him yet. Kristen could hear him crying and was worried about him as well but another baby was on its way.


D had a Prolapsed Cord, which with almost any other Doctor, and almost any other patient would usually result in a C-section. Doctor Cummings is an amazing Doctor, and Kristen is even more amazing.  The Doctor had to move the cord out of the way and around D’s head before he came out… there is only one way to do that without creating a surgical opening, and Kristen did so well, and stayed as calm as possible under the circumstances.  Then the water broke (I'm pretty sure the water broke before he moved the cord...just sayin') and D came out head first, it was 3:12, only nine minutes since F and it felt like seconds or hours. F had had a little trouble breathing and was given oxygen and so they took him to the NICU, I was able to hold D and show him to Kristen, then he too was taken to the NICU.


D never needed help breathing, and F was breathing on his own almost as soon as he got into the NICU, nether got breathing tubes.  Kristen was soon relaxing in bed, and around 5:30 she got her first look at both our sons.  Their blood sugar was low, and as they were unable to eat enough at this point they were still in the NICU. As of this writing they are still in the NICU, but the only thing we are waiting on for them to get out is to be able to eat.


And so our family of three has gone to a family of five, and I love those little boys who I have only know in the flesh for less than 48 hours, just as much as the rest of my family.


 The NICU is it's own story but for tonight I will end here.

Wednesday, January 26, 2011

tally's kale salad

At Christmas time my lovely sister in law Tally came in town to visit and made us this delicious salad. It's actually based off of  this Martha Stewart recipe. This is one of the best salads I've had in a while. I had forgotten just how good it was until I made it the other day to take to a meeting at my birthing center.

It's an amazingly flavorful salad especially considering how simple the ingredients are. 


The Salad

the juice of 1 lemon
1tbs lemon zest
1/4 cup extra virgin olive oil
8 cups shredded kale (ribs removed)
1/2 cup Parmesan cheese
1/2 cup toasted sunflower seeds
coarse salt 
freshly ground black pepper

Mix the lemon, zest, and olive oil to make a dressing.
Toss kale with dressing to coat.
Add 1/2 cup good Parmesan cheese and the sunflower seeds.
Season well with salt and pepper and toss well.


Kale is high in antioxidants, fiber, calcium, vitamins a, b, c, & k, and has one of the highest protein content found in veggies. It's also a good source of iron. Anyone can benefit from the great nutritional content in kale but if you are pregnant then I highly recommend it.

Monday, January 24, 2011

free art {and a winner!}

First of all I want to thank all of you who entered my first giveaway and welcome all of my new followers. 
Today is the only day that I have ever really wished that I could be Oprah. That you would all show up to see who won and I would say "surprise! everyone who entered gets a gift card! and now let's all hop on a plane and go to Australia!" Wouldn't that be nice?
So I thought...what can I "give" to my readers
and then I remembered all of the beautiful free printable art on the web
(that I have been meaning to use myself).

The first place that I would like to introduce you to is Indie Fixx... home of the free art project.

wouldn't these be lovely in a nursery?
and these are the prints that I am thinking about using in the Little One's room.

and they have lovely things for adults too.

all of these prints are on this page on indie fixx

The Graphics FairyVintage Printable - Bringing Public Domain to the Public
if you prefer something a little more vintage then the graphics fairy and vintage printable are for you

i really like these vintage coffee & tea prints for a kitchen

and how lovely are these botanic prints
{pink flower, butterflies, hyacinth, lilypads}
and there are eggs and feathers for all of the bird lovers out there
and word art if that's your thing.
{fruit of the spirit, eat dinner, keep calm, easy peasy}

and most of these blogs have even more art to choose from. you could spend an afternoon picking out free art for your house!

and before i forget i had better announce the winner for the $25 csn stores giveaway....

And A Great Big Thanks to Everyone who entered!

Monday, January 17, 2011

brown paper packages tied up with string {a csn stores giveaway} NOW CLOSED

Giveaway Closed

Giveaways are some of my favorite things....
I was very excited to be contacted by CSN to host this giveaway.
CSN is comprised of over 200 online stores, where you can find everything from modern duvet covers to Le Creuset cookware!  And they are giving one of my very lucky readers a $25 gift code that you can use in any of their 200+ stores!

To give you an idea of the vast merchandise CSN stores carry I thought I would show you my favorite things under $25.


7) sparrow brag book 8) flower tea light candle holder 9) mini art card
10) ceramic bird 11) ceramic accent plate 12) mercury glass votive


13) dog collar 14) eco lunchbox 15) preschool stacking ring
16) sushi play set 17) dumbbells 18) nfl controller faceplate

And of course there are plenty of big things that you could put your gift card towards too. CSN has furniture, lighting, and even kitchen sinks!


This giveaway is open to residents of U.S. and Canada however
there may be international shipping charges in the case of Canadian addresses (CSN only ships to the US and Canada).

Giveaway Closed
 Three easy ways to enter:
  1. Click the Facebook "Like" button & comment telling me that you did
  2. Click the "retweet" button & comment telling me that you did
  3. Subscribe or follow my blog & comment telling me that you did
You may enter all 3 different ways just make sure that you leave a separate comment for each entry .
Make sure to leave your email address for each entry.
Winner will be selected by a random number generator.
The winner will have 72 hrs to respond before I draw a new winner.
Giveaway will close on (Saturday) January 22 at 7pm central time.

Be sure to check back on Monday (Jan 24th) when I will be announcing a winner!


listen on : online sweepstakes  & mom giveaways

Monday, January 3, 2011

the candy cake {and a second birthday!}


 At the end of December the Little One turned 2. 
I made her birthday cake last year with the decorating expertise of my sister-inlaw Mandy.
But this year Mandy didn't come up for Christmas so I was on my own.
Decorating cakes is not something that I excel at , but I still wanted it to look nice. I found this cake on a few different blogs and read about how incredibly easy it was.

Basically if you suck at icing then this cake is for you. The icing doesn't have to be smooth or look nice. It can even have crumbs in it (although I must be getting better because I didn't have that problem).

All you do is whip up a cake. Your favorite recipe or even a box from the store. (I totally used a box!) I recommend a white or yellow cake (I used a fudge swirl)...just because there is already so much chocolate.

Then you get some icing. You could buy a tub of icing from the store, but making icing is so easy and will really make your cake taste a lot better. I thought about using the "secret family icing recipe" that I always use (because it's so amazingly good), but was concerned that since it is so light and fluffy it would not hold up the candy very well. And I wanted to use chocolate so if any icing showed through the candy it wouldn't be noticable. I then decided to use:

(I knew I couldn't go wrong with one of her recipes and I was right!
Here is the doubled version...which should be more than enough )

1 cup butter, softened
16 oz cream cheese, softened
1 cup unsweeted cocoa powder
2 lb confectioner's sugar (yikes, i know!)
2 tsp vanilla
2-6 tbs milk (i did not use any milk)

Cream the butter and cheese in your mixer. (Heaven help you if you don't have a mixer.)
Add the cocoa and vanilla and mix well.
Add the sugar in small batches and blend until well combined. Be sure to scrape down the sides as you go!
If the icing is too sticky (which it shouldn't be if you are making this cake) add 1 tbs milk at a time until it's the consistency that you want.
 

Then you frost your cooled cake while not worrying too much about how it looks.

Then you take 4 large packages of Kit Kats (5 if you buy the king sized)
and break them into two bar sections. And stand them around the outside of your cake...Making sure that they are well stuck down to your icing.

Then you take a bag of M&M's and spread the desired amount over the top.

I actually mixed a bag of regular M&Ms and Valentine's M&Ms so there would be plenty of pink in the mix.

And then I took a piece of ribbon and wrapped it around the bottom of the kit kats' and glued it down on the ends with some left over icing.

 It absolutely could not have been easier and it was a big hit!

And the Little One had a fabulous second birthday. When her daddy prayed with her that night she thanked God for her birthday. And then said "again".  Her daddy told her "next year", she said "ok", and went to sleep.


I'm sure that you are thinking that it must be a blue moon or something because I haven't been posting many blogs lately.  Between finding out that we are pregnant again, our computer dying twice, and then finding out that we are actually having twins... well I've been just a bit pre-occupied.
But I'm still here and will get to posting when I can.

Hope that everyone is having a wonderful New Year!

Tuesday, October 26, 2010

Vegetarian Meatloaf (really good! really!)


I've had great results with this recipe. Even meat eaters and kids that I have made this for have inhaled it. I like to serve it with gravy, mashed potatoes, and peas. It's also great with my thyme yorkshire puddings. I also think that it would be a perfect protein dish for thanksgiving if you are expecting vegetarians.

Vegetarian Meatloaf
          2 cups water
          1 tsp salt
          1 cup brown lentils (wash and check for small rocks)
          1 medium onion, diced
          1 cup quick-cooking oats
          3/4 cup grated cheese (use a flavorful cheese)
          1 egg, beaten
          4 1/2 oz tomato sauce or spagetti sauce
          1 tsp garlic powder
          1 tsp dried basil
          1 tbs dried parsley
          1/2 tsp seasoning salt
          1/2 tsp black pepper

Bring salted water to a boil. Add lentils and simmer, covered for 25-30 min (until lentils have absorbed most of the water). 
Remove from pan, drain, and mash lentils in a mixing bowl. Set aside and let lentils cool a bit. 
Stir in onions, oats, and cheese until well mixed.
Add egg, tomato sauce, and the remaining seasonings and mix well.
Spoon into a well greased loaf pan.
Smooth with back of spoon.
Bake at 350*F for 30 - 45 min or until top of loaf is firm, dry, and golden brown.
Cool in pan, on rack for 10 min.
recipe source:  http://www.food.com


Not only is this recipe a fabulous comfort food, it's also extremely nutritious. Lentils are made up fo 25% protein. They are cholesterol free, virtually fat free, and low in calories. Lentils are high in folate, iron (perfect if you do have a bun in the oven) and high in fiber.

Saturday, August 28, 2010

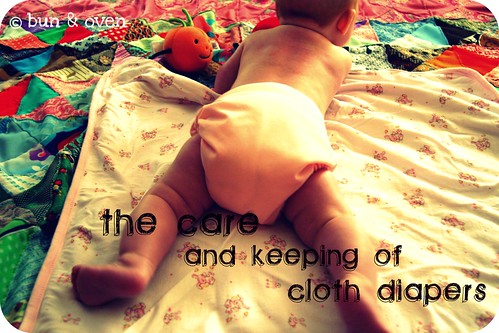
cloth diapers, the care and keeping of

Hi friends from Pinterest! Thanks for stopping by. I stopped writing on this blog once I had my twins. Feel free to come visit me over on my new blog That Crunchy Twin Mom and learn all of my teething & diaper rash secrets and more.

I decided to write this post because it took me over a year to get my cloth diapering system down. Mostly because I didn't know anyone nearby that actually cloth diapered. Yes, there are a lot of posts on the internet about it but for me it really took being around other cloth diapering mamas and seeing what they were doing. So this is my attempt to "show" you how I do it in hopes of helping someone else like me out there.....

As you may be able to tell I use the Bum Genius all in one style diapers. (These are great because they will grow with your child.) There are a lot of blogs out there that tell you the differences between diapers and help you decide which ones are best for you. My decision was easy. I had received quite a few Target Gift Cards from baby showers. You can buy Bum Genius Diapers through the Target website. I waited around until they shipped for free (Target's always having a promotion for something to ship for free) and I placed my order through ebates. I actually made money off of these diapers.


The first thing that you are going to need is a diaper sprayer. I went a whole year without a diaper sprayer. Trust me. You need one. So clean off your soiled diapers. I use a towel to transport them from the bathroom to the laundry room where I keep my diaper pail. I have a friend that keeps hers in their kid's bathroom closet. Some people use wet bags. Do what works for you.

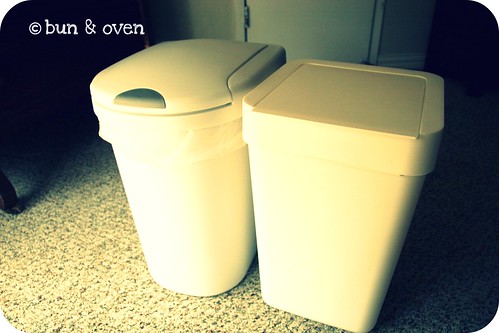
(the first one was $12 at Target and the second one is from Ikea...sorry I don't remember how much)

You are definitely going to need is a diaper pail. Any small trash can with a lid will do. (I recommend not using a diaper genie.) You have two options. You can simply toss your soiled diapers into the empty can or you can fill your can about half way with water and 1 cup of vinegar.  The first option works fine if you was the diapers every other day. If you want a little leeway I recommend using the water and vinegar method as it will keep your diapers from mildewing and stinking up the whole house as quickly.

 When it's time to do laundry I dump the entire contents of my diaper pail into the washing machine. Then I use the spin cycle to get rid of the vinegar water that the diapers have been sitting in. I then run the machine on cold (if you use hot or warm it's smelly) with a cup of vinegar to neutralize the smell and to thoroughly rinse the diapers. Then I do the real wash in hot hot water. We use our own home made laundry detergent. It helps save even more money and keeps more chemicals away from out little one's bum... which is part of the reason I wanted to cloth diaper in the first place. (pampers chemical burns anyone?)

I do not use fabric softener. I do not use bleach*. I do not use stain remover.

I have read that all of those things can break down the waterproof lining. And well frankly cloth diapers are not cheap and being peed or pooped on is not fun. Enough said.

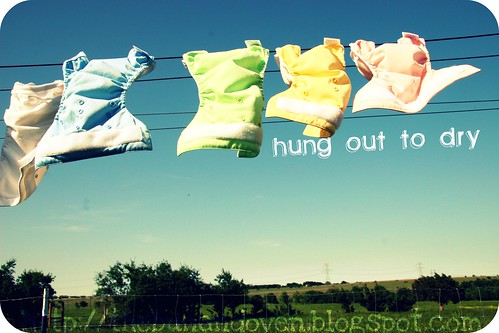
Then I take my fresh clean diapers and hang them outside on the clothes line. This has two purposes.
#1) The sun will bleach any stains you may have out of the diapers. Shockingly enough the insides of my diapers still look perfectly white and brand new. All it takes is hanging them outside.

#2) Washing machines take a huge toll on cloth diapers. Want them to wear out fast so you have a good excuse to go back to disposables? Just wash them in your dryer. Now obviously you will have to do this on occasion. If it's below freezing outside or has been raining for days. Every now and then is fine. And my sister in law has discovered that it can help to reactivate the velcro if its starting to not want to stick.


When they are dry and clean I re-stuff all of my diapers with the liners and put them in a basket. That way they are ready to go.

Notes

* About the bleach comment I made earlier. As soon as I wrote that I went and checked on my diapers that were in the wash. I had washed them twice and the inserts still weren't smelling fresh. The liners were fine so I did "strip" (by washing them again with 1/4C bleach.... (the inserts, not the liners).

* I know that a lot of people use cloth for night time and for outings. We don't. We chose to use disposables for sleeping because they are much more absorbent and are better at wicking the moisture away from the little one's skin. And for going out just because i didn't want to haul dirty diapers around with me. And sometimes when I don't feel like doing laundry today I'll throw them on her too.

* Because cloth diapers aren't going to wick the moisture away as well as disposables you are going to have to change them more often. Also because of that they are fabulous for potty training. My daughter even takes off her cloth diapers after she pees and puts them into the diaper pail.

* Another great thing about cloth for us is that the Little One has only had one real diaper rash. Of course it was when we were out of town, using disposables, and had left the diaper cream at home. She has gotten a little red down there a few times but we were always able to catch it before it turned into anything bad. I think that using cloth has really helped in that area. (Technically you are not supposed to use diaper cream with cloth diapers.)

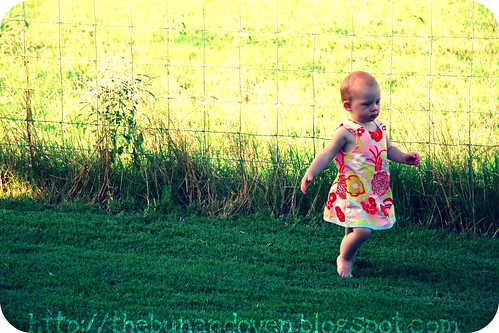
* Because cloth diapers are a bit bulky the Little One pretty much lives in dresses (especially so during the summer). It makes it much easier to change and she doesn't look like she has a huge butt in them.


 If you have any questions about cloth diapering please feel free to leave them and I will answer them to the best of my ability.


If you cloth diaper and have any comments, helpful hints, or suggestions please leave them here.


And if you have blogged about cloth diapering please leave/ email me a link! I would love to have as much information on here as possible.

Thanks!

Thursday, June 17, 2010

Garlic Broccoli (& friends)


I don't know about you but my favorite thing to get at a Chinese restaurant is Garlic Broccoli. It's my favorite way to eat broccoli and it makes me crave it. I decided that I had to find a way to make it at home. This recipe is not only quick and easy, but tastes like it's fresh out of the take out carton of your favorite Chinese restaurant. YUM!

Garlic Broccoli
is ready in 30 min!
serves 4

3 medium heads of broccoli, washed and chopped
1 head of garlic, minced
2 cups vegetable stock
1/4 cup soy sauce
1 tsp powdered ginger
1 tsp red pepper flakes
1/4 cup sweetener (i use unbleached sugar)
2 tbs corn starch
2 cups of cooked white rice to serve with broccoli

Bring the vegetable stock to a boil and add the garlic, soy sauce, ginger, red pepper, and sweetener. Dissolve the cornstarch in 4 tbs of cold water.
Cook the broccoli over high heat, in a large skillet or wok. After 2 min add the garlic sauce and continue cooking for 7-10 min. Add the cornstarch mixture, stir to distribute, and cook for 1 -2 more min until it thickens.
Serve immediately over your already cooked rice.

Reccomendations:
* Use the broccoli stalk! Simply peel it (this makes it nice and tender) and slice it thinly. Try it at least once! It will change the way you eat broccoli.
* You don't have to use all broccoli. I also used carrots, bamboo shoots, and water chestnuts. I would love to use tofu in this dish. or snow peas. The combinations you can use are endless. Just make sure that you use approx the amount that 3 heads of broccoli would be. Maybe a little less because you want to have lots of sauce.
*If you use honey for your sweetener just remember that it's sweeter per volume than sugar. So go easy.
*Also you can omit the ginger and red pepper flakes if you want. Be especially careful with the ginger though. I used a "fresher" ginger one of the times I made this and it was so strong. I called it ginger broccoli that night. All I'm sayin' is...be careful with the ginger. It can easily over power this dish.


And then you can feel good about feeding it to your little ones because broccoli is full of iron, fiber, potassium, and has a ton of vitamin C, and a ton of Calcium. My little one loves this dish.

Thursday, May 20, 2010

you capture: depth of field

This past week I had the pleasure of taking photos of my sister-in law B and her friends before going to prom. They thought I was a little crazy taking photos of things with them in the background.

B and her mask....it was a masquerade prom


and B's bff and her date with her beautiful corsage.


And I feel a little crazy because I started a page on facebook just for my photography. Are regular people like me allowed to just start up little photography businesses because we feel like it? I don't know, but the voice in my head is telling me to be bold. If you want to see the sham that is my photography "business" (even though no one pays me) there is a link on the left hand side of my blog. And the rest of the prom pics are there too. I would love any feedback you guys can give me. I'm all for constructive criticism as long as it's tactful. :-) ooh and i like compliments too.

Wednesday, April 28, 2010

you capture: spring


This week we took the Little One to the Japanese Spring Festival at the local botanic gardens. I thought it was a perfect opportunity to take some photos for the You Capture challenge this week. I meant to include some photos of the Little One herself but the internet that I mooch from my sister in law (thank you April!) is being super slow.


As you can tell I've been playing around with my little photography logo and name. I figure that I can do that since I'm not a professional and have no clue what I'm doing anyway. Just don't tell anyone that.

Photobucket


Be sure to check out everyone else's Spring pictures out by visiting I Should Be Folding Laundry 

Tuesday, April 27, 2010

Traditional British Pudding

The April 2010 Daring Bakers’ challenge was hosted by Esther of The Lilac Kitchen. She challenged everyone to make a traditional British pudding using, if possible, a very traditional British ingredient: suet. I did not use suet as it is an animal product. I used a steamed chocolate pudding recipe from www.puddingclub.com. I made four baby puddings instead of one larger one. They weren't great plain but they were pretty great topped with some french vanilla ice cream and some chocolate sauce. The strawberries didn't hurt either. here is the converted recipe:

Steamed Chocolate Pudding

1/2 C Butter
1/2 C Castor (Powdered)Sugar
1/2 Self Rising Flour
2 Tbs Cocoa
2 Eggs
1/4 C Chocolate Chips

Cream the butter & sugar together until light and fluffy. Sift the flour and sugar together and add a little at a time along with the egg. Stir in half the chocolate chips. Place the remaining chocolate chips on the base of your greased (1.1 litre) pudding bowl. Add the dough. Steam for 1 1/2 hours. Turn out and serve with chocolate sauce, custard, or extra thick (whatever that is!).

See steaming method below...


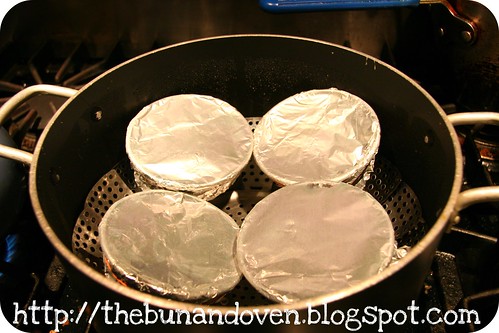
Here are my ramekins wrapped in aluminum foil and secured with rubber bands. I steamed them in a large pot with a steamer basket but you could easily use a crock pot. I used tongs to remove them when they were done as they were very hot. I cooked them for the full hour and a half even though they were smaller.


Thursday, April 8, 2010

you capture: comfort

This week's challenge was ...well challenging. My daughter is my favorite subject (as you can probably tell) so I decided to go with something (other than myself) that she finds comfort in. Her kitty.


Hope that you all are having a great week!


Photobucket

Thursday, April 1, 2010

you capture: feet

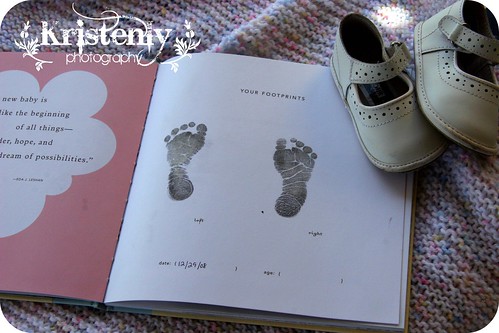
 I don't know if you have noticed, but as much as I love baking...I actually have come to love photography more. I came across this "group" I suppose you could say. It's called You Capture and they give out photography assignments every week. I don't know if there is such thing as a "cooking & photography blog" but there is now. Like the Nester says... this is my blog and I can mess it up anyway I want to. So without further ado i present to you my first assignment...feet



For a long time there were only your footprints and laughter in our dreams and even from such small things, we knew we could not wait to love you forever.
 

Photobucket