Monday, January 17, 2011

brown paper packages tied up with string {a csn stores giveaway} NOW CLOSED

Giveaway Closed

Giveaways are some of my favorite things....
I was very excited to be contacted by CSN to host this giveaway.
CSN is comprised of over 200 online stores, where you can find everything from modern duvet covers to Le Creuset cookware!  And they are giving one of my very lucky readers a $25 gift code that you can use in any of their 200+ stores!

To give you an idea of the vast merchandise CSN stores carry I thought I would show you my favorite things under $25.


7) sparrow brag book 8) flower tea light candle holder 9) mini art card
10) ceramic bird 11) ceramic accent plate 12) mercury glass votive


13) dog collar 14) eco lunchbox 15) preschool stacking ring
16) sushi play set 17) dumbbells 18) nfl controller faceplate

And of course there are plenty of big things that you could put your gift card towards too. CSN has furniture, lighting, and even kitchen sinks!


This giveaway is open to residents of U.S. and Canada however
there may be international shipping charges in the case of Canadian addresses (CSN only ships to the US and Canada).

Giveaway Closed
 Three easy ways to enter:
  1. Click the Facebook "Like" button & comment telling me that you did
  2. Click the "retweet" button & comment telling me that you did
  3. Subscribe or follow my blog & comment telling me that you did
You may enter all 3 different ways just make sure that you leave a separate comment for each entry .
Make sure to leave your email address for each entry.
Winner will be selected by a random number generator.
The winner will have 72 hrs to respond before I draw a new winner.
Giveaway will close on (Saturday) January 22 at 7pm central time.

Be sure to check back on Monday (Jan 24th) when I will be announcing a winner!


listen on : online sweepstakes  & mom giveaways

Monday, January 3, 2011

the candy cake {and a second birthday!}


 At the end of December the Little One turned 2. 
I made her birthday cake last year with the decorating expertise of my sister-inlaw Mandy.
But this year Mandy didn't come up for Christmas so I was on my own.
Decorating cakes is not something that I excel at , but I still wanted it to look nice. I found this cake on a few different blogs and read about how incredibly easy it was.

Basically if you suck at icing then this cake is for you. The icing doesn't have to be smooth or look nice. It can even have crumbs in it (although I must be getting better because I didn't have that problem).

All you do is whip up a cake. Your favorite recipe or even a box from the store. (I totally used a box!) I recommend a white or yellow cake (I used a fudge swirl)...just because there is already so much chocolate.

Then you get some icing. You could buy a tub of icing from the store, but making icing is so easy and will really make your cake taste a lot better. I thought about using the "secret family icing recipe" that I always use (because it's so amazingly good), but was concerned that since it is so light and fluffy it would not hold up the candy very well. And I wanted to use chocolate so if any icing showed through the candy it wouldn't be noticable. I then decided to use:

(I knew I couldn't go wrong with one of her recipes and I was right!
Here is the doubled version...which should be more than enough )

1 cup butter, softened
16 oz cream cheese, softened
1 cup unsweeted cocoa powder
2 lb confectioner's sugar (yikes, i know!)
2 tsp vanilla
2-6 tbs milk (i did not use any milk)

Cream the butter and cheese in your mixer. (Heaven help you if you don't have a mixer.)
Add the cocoa and vanilla and mix well.
Add the sugar in small batches and blend until well combined. Be sure to scrape down the sides as you go!
If the icing is too sticky (which it shouldn't be if you are making this cake) add 1 tbs milk at a time until it's the consistency that you want.
 

Then you frost your cooled cake while not worrying too much about how it looks.

Then you take 4 large packages of Kit Kats (5 if you buy the king sized)
and break them into two bar sections. And stand them around the outside of your cake...Making sure that they are well stuck down to your icing.

Then you take a bag of M&M's and spread the desired amount over the top.

I actually mixed a bag of regular M&Ms and Valentine's M&Ms so there would be plenty of pink in the mix.

And then I took a piece of ribbon and wrapped it around the bottom of the kit kats' and glued it down on the ends with some left over icing.

 It absolutely could not have been easier and it was a big hit!

And the Little One had a fabulous second birthday. When her daddy prayed with her that night she thanked God for her birthday. And then said "again".  Her daddy told her "next year", she said "ok", and went to sleep.


I'm sure that you are thinking that it must be a blue moon or something because I haven't been posting many blogs lately.  Between finding out that we are pregnant again, our computer dying twice, and then finding out that we are actually having twins... well I've been just a bit pre-occupied.
But I'm still here and will get to posting when I can.

Hope that everyone is having a wonderful New Year!

Tuesday, October 26, 2010

Vegetarian Meatloaf (really good! really!)


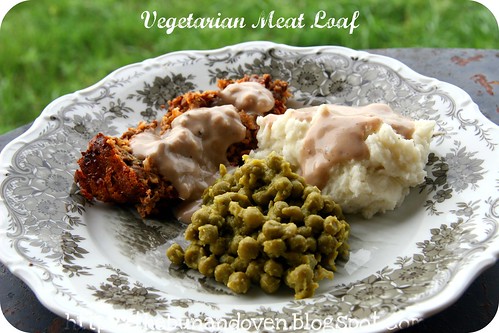
I've had great results with this recipe. Even meat eaters and kids that I have made this for have inhaled it. I like to serve it with gravy, mashed potatoes, and peas. It's also great with my thyme yorkshire puddings. I also think that it would be a perfect protein dish for thanksgiving if you are expecting vegetarians.

Vegetarian Meatloaf
          2 cups water
          1 tsp salt
          1 cup brown lentils (wash and check for small rocks)
          1 medium onion, diced
          1 cup quick-cooking oats
          3/4 cup grated cheese (use a flavorful cheese)
          1 egg, beaten
          4 1/2 oz tomato sauce or spagetti sauce
          1 tsp garlic powder
          1 tsp dried basil
          1 tbs dried parsley
          1/2 tsp seasoning salt
          1/2 tsp black pepper

Bring salted water to a boil. Add lentils and simmer, covered for 25-30 min (until lentils have absorbed most of the water). 
Remove from pan, drain, and mash lentils in a mixing bowl. Set aside and let lentils cool a bit. 
Stir in onions, oats, and cheese until well mixed.
Add egg, tomato sauce, and the remaining seasonings and mix well.
Spoon into a well greased loaf pan.
Smooth with back of spoon.
Bake at 350*F for 30 - 45 min or until top of loaf is firm, dry, and golden brown.
Cool in pan, on rack for 10 min.
recipe source:  http://www.food.com


Not only is this recipe a fabulous comfort food, it's also extremely nutritious. Lentils are made up fo 25% protein. They are cholesterol free, virtually fat free, and low in calories. Lentils are high in folate, iron (perfect if you do have a bun in the oven) and high in fiber.

Saturday, August 28, 2010

cloth diapers, the care and keeping of

Hi friends from Pinterest! Thanks for stopping by. I stopped writing on this blog once I had my twins. Feel free to come visit me over on my new blog That Crunchy Twin Mom and learn all of my teething & diaper rash secrets and more.

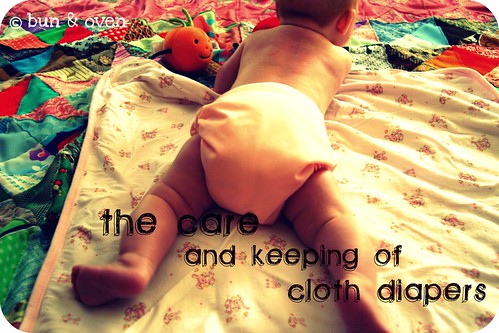
I decided to write this post because it took me over a year to get my cloth diapering system down. Mostly because I didn't know anyone nearby that actually cloth diapered. Yes, there are a lot of posts on the internet about it but for me it really took being around other cloth diapering mamas and seeing what they were doing. So this is my attempt to "show" you how I do it in hopes of helping someone else like me out there.....

As you may be able to tell I use the Bum Genius all in one style diapers. (These are great because they will grow with your child.) There are a lot of blogs out there that tell you the differences between diapers and help you decide which ones are best for you. My decision was easy. I had received quite a few Target Gift Cards from baby showers. You can buy Bum Genius Diapers through the Target website. I waited around until they shipped for free (Target's always having a promotion for something to ship for free) and I placed my order through ebates. I actually made money off of these diapers.


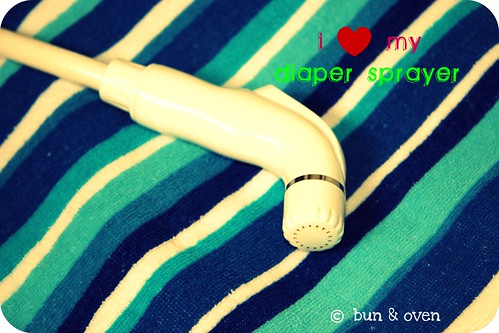
The first thing that you are going to need is a diaper sprayer. I went a whole year without a diaper sprayer. Trust me. You need one. So clean off your soiled diapers. I use a towel to transport them from the bathroom to the laundry room where I keep my diaper pail. I have a friend that keeps hers in their kid's bathroom closet. Some people use wet bags. Do what works for you.

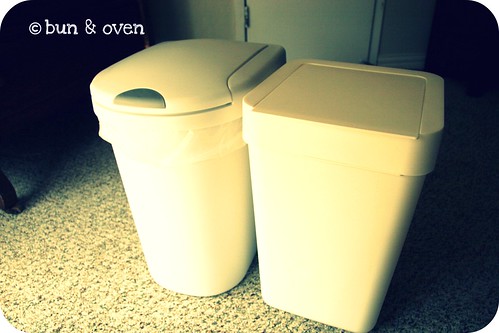
(the first one was $12 at Target and the second one is from Ikea...sorry I don't remember how much)

You are definitely going to need is a diaper pail. Any small trash can with a lid will do. (I recommend not using a diaper genie.) You have two options. You can simply toss your soiled diapers into the empty can or you can fill your can about half way with water and 1 cup of vinegar.  The first option works fine if you was the diapers every other day. If you want a little leeway I recommend using the water and vinegar method as it will keep your diapers from mildewing and stinking up the whole house as quickly.

 When it's time to do laundry I dump the entire contents of my diaper pail into the washing machine. Then I use the spin cycle to get rid of the vinegar water that the diapers have been sitting in. I then run the machine on cold (if you use hot or warm it's smelly) with a cup of vinegar to neutralize the smell and to thoroughly rinse the diapers. Then I do the real wash in hot hot water. We use our own home made laundry detergent. It helps save even more money and keeps more chemicals away from out little one's bum... which is part of the reason I wanted to cloth diaper in the first place. (pampers chemical burns anyone?)

I do not use fabric softener. I do not use bleach*. I do not use stain remover.

I have read that all of those things can break down the waterproof lining. And well frankly cloth diapers are not cheap and being peed or pooped on is not fun. Enough said.

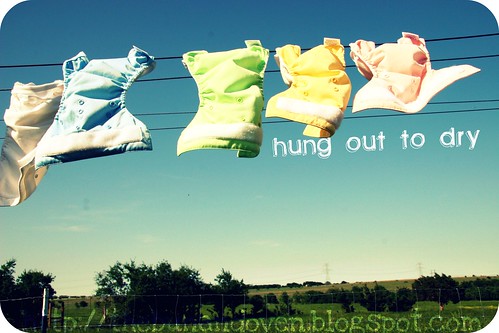
Then I take my fresh clean diapers and hang them outside on the clothes line. This has two purposes.
#1) The sun will bleach any stains you may have out of the diapers. Shockingly enough the insides of my diapers still look perfectly white and brand new. All it takes is hanging them outside.

#2) Washing machines take a huge toll on cloth diapers. Want them to wear out fast so you have a good excuse to go back to disposables? Just wash them in your dryer. Now obviously you will have to do this on occasion. If it's below freezing outside or has been raining for days. Every now and then is fine. And my sister in law has discovered that it can help to reactivate the velcro if its starting to not want to stick.


When they are dry and clean I re-stuff all of my diapers with the liners and put them in a basket. That way they are ready to go.

Notes

* About the bleach comment I made earlier. As soon as I wrote that I went and checked on my diapers that were in the wash. I had washed them twice and the inserts still weren't smelling fresh. The liners were fine so I did "strip" (by washing them again with 1/4C bleach.... (the inserts, not the liners).

* I know that a lot of people use cloth for night time and for outings. We don't. We chose to use disposables for sleeping because they are much more absorbent and are better at wicking the moisture away from the little one's skin. And for going out just because i didn't want to haul dirty diapers around with me. And sometimes when I don't feel like doing laundry today I'll throw them on her too.

* Because cloth diapers aren't going to wick the moisture away as well as disposables you are going to have to change them more often. Also because of that they are fabulous for potty training. My daughter even takes off her cloth diapers after she pees and puts them into the diaper pail.

* Another great thing about cloth for us is that the Little One has only had one real diaper rash. Of course it was when we were out of town, using disposables, and had left the diaper cream at home. She has gotten a little red down there a few times but we were always able to catch it before it turned into anything bad. I think that using cloth has really helped in that area. (Technically you are not supposed to use diaper cream with cloth diapers.)

* Because cloth diapers are a bit bulky the Little One pretty much lives in dresses (especially so during the summer). It makes it much easier to change and she doesn't look like she has a huge butt in them.


 If you have any questions about cloth diapering please feel free to leave them and I will answer them to the best of my ability.


If you cloth diaper and have any comments, helpful hints, or suggestions please leave them here.


And if you have blogged about cloth diapering please leave/ email me a link! I would love to have as much information on here as possible.

Thanks!